JPriseMerge
Screenshots
a JPrise Inc. tool for merging genealogy databases
The alpha pre-release of JPriseMerge is now available for evaluation.
The following shows highlights from different screenshots. Click on the thumbnail image to see a full scale version.
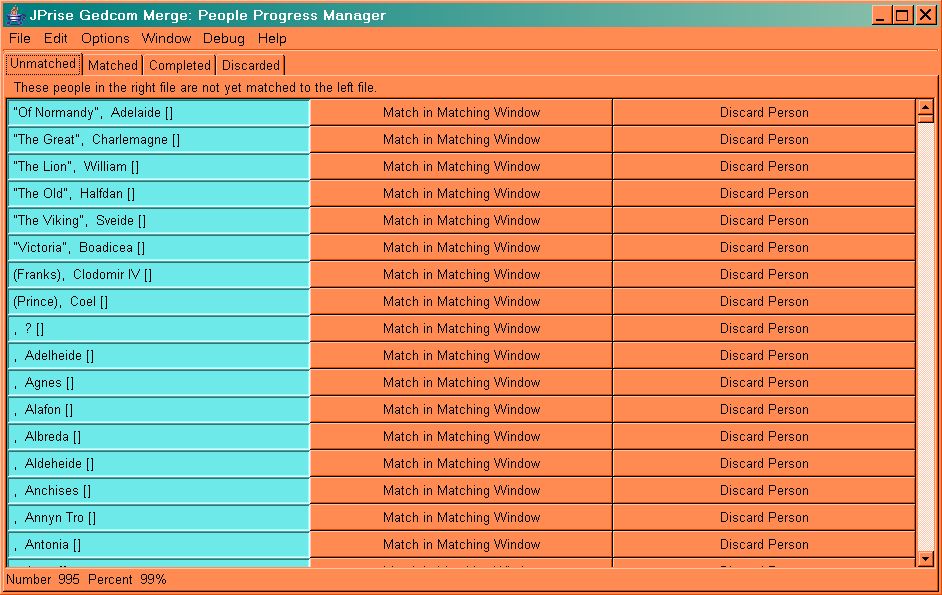
Progress Manager View
This view shows the People Progress Manager. This helps the user to keep track of the status of their progress in merging elements from two different databases into a single database. From here the user can see what elements remain unmatched between their databases, which elements have been matched up against each other, which elements have been marked as completed during the merge, and which elements were discarded from one of the data bases. |
||||||
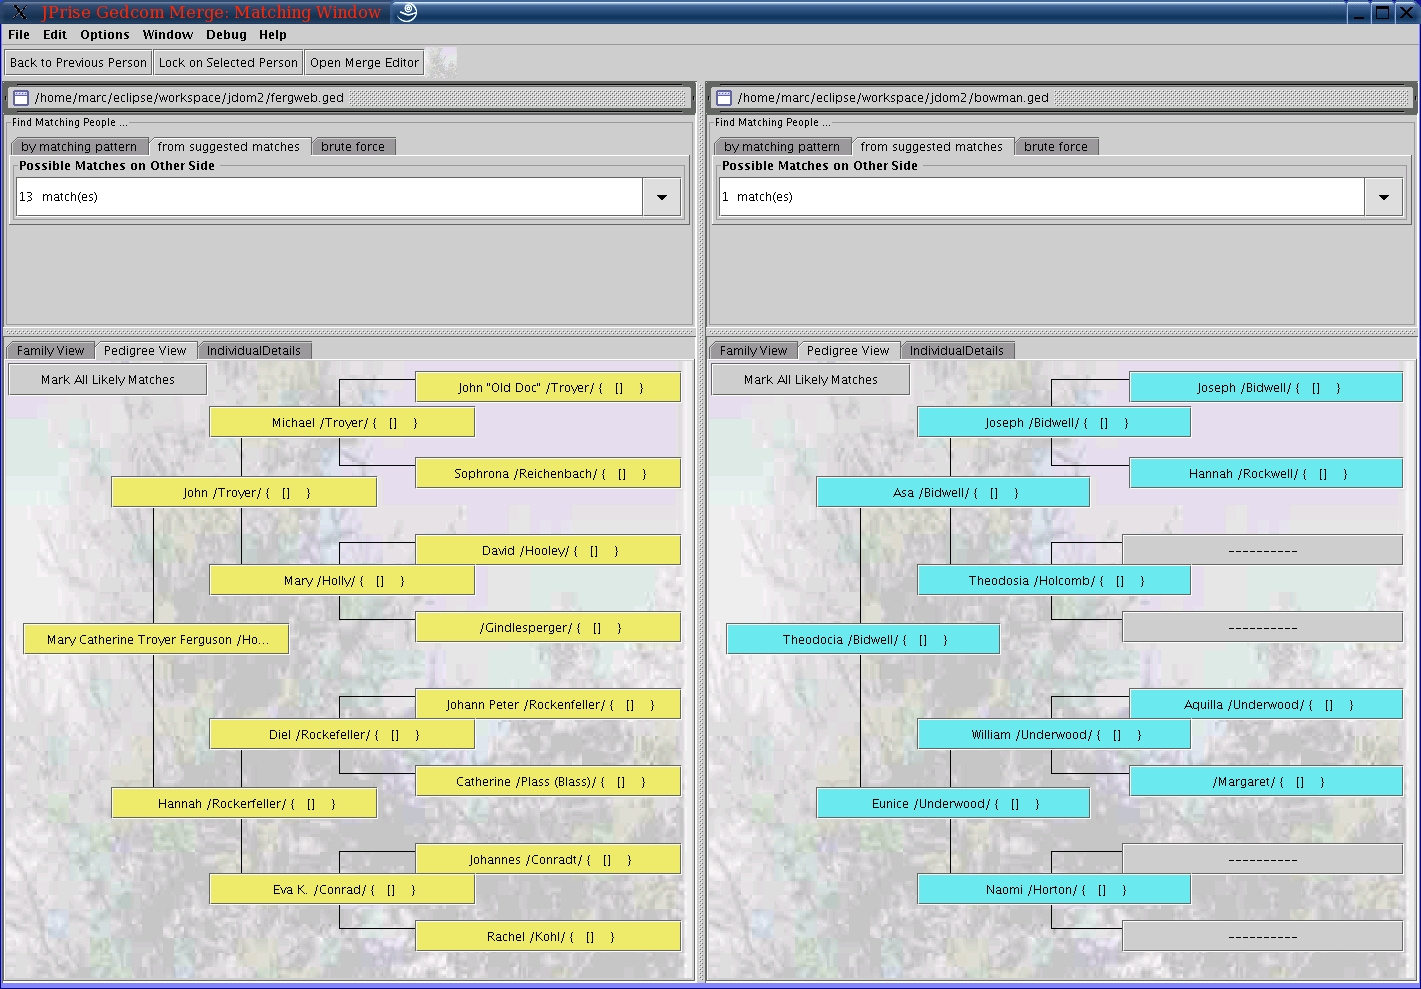
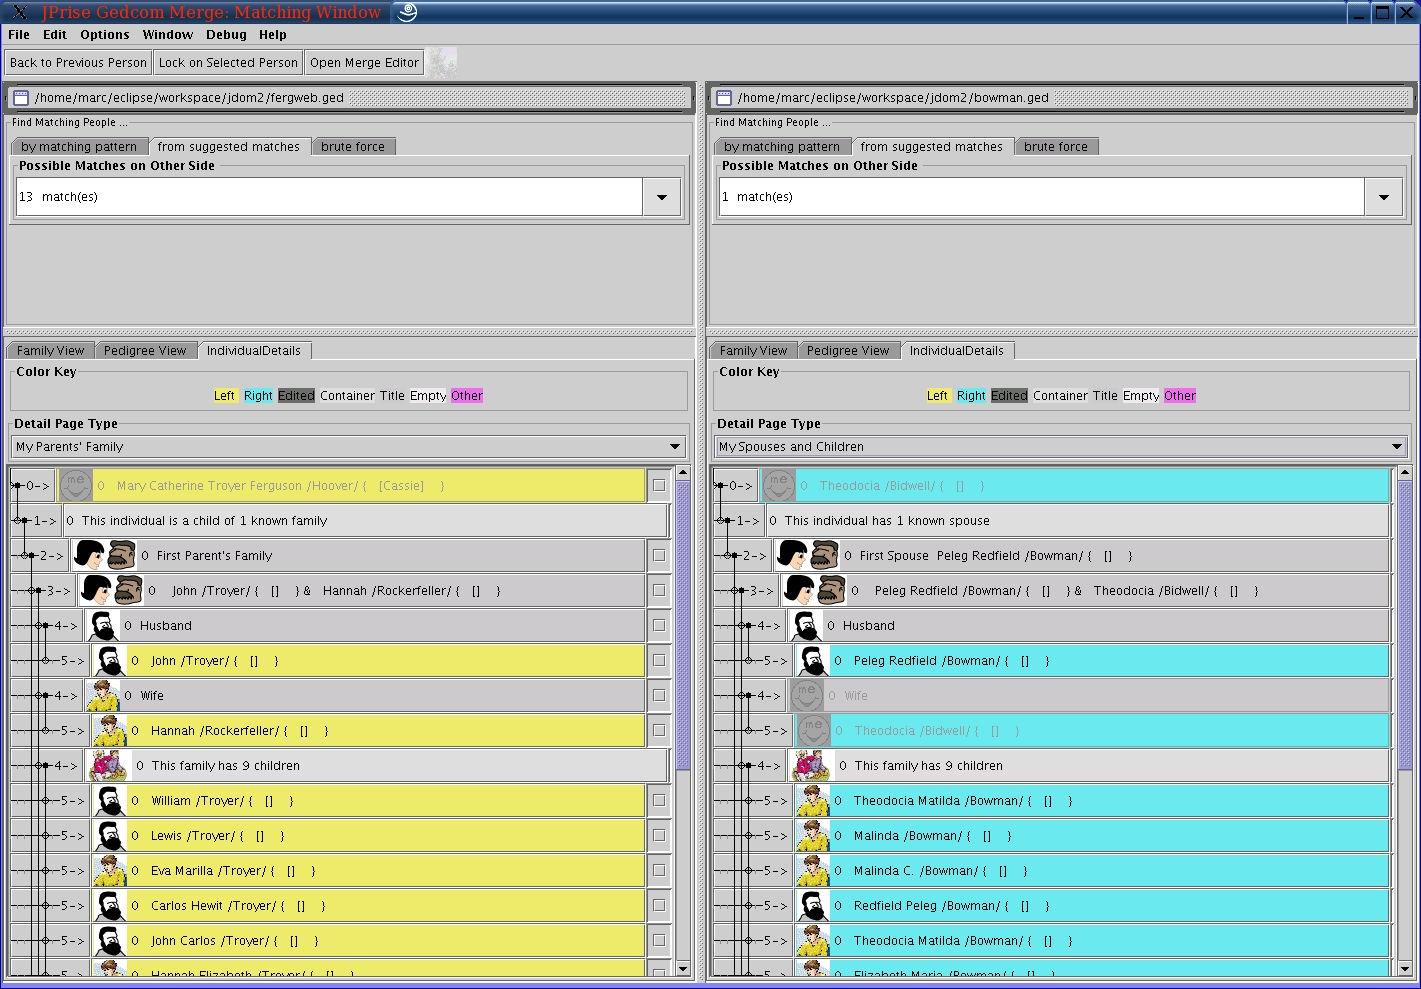
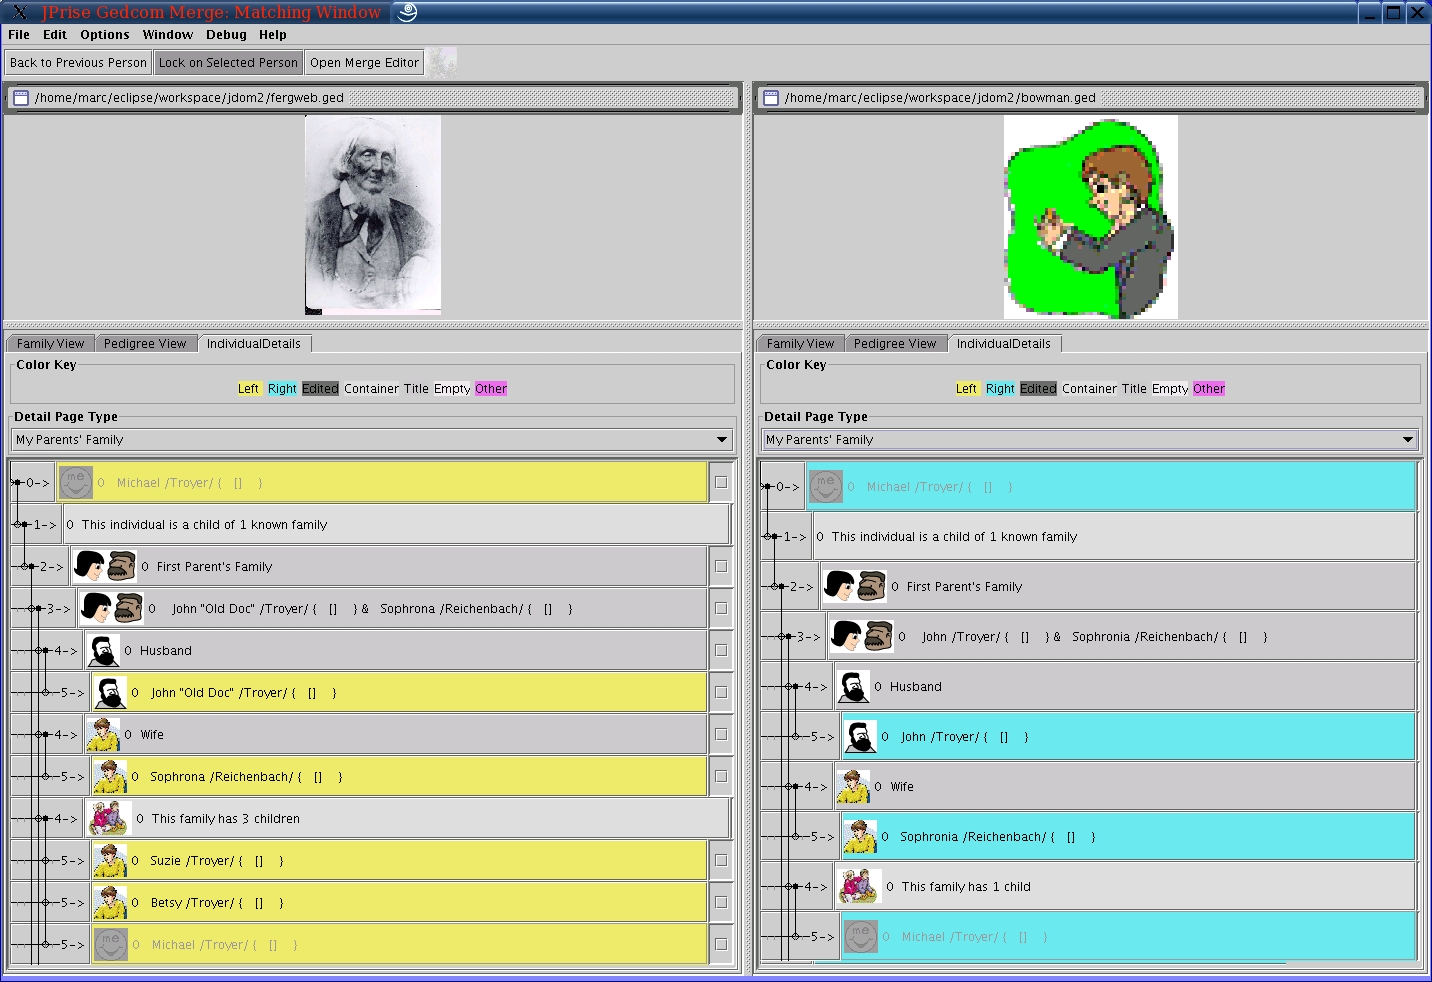
Match and Merge View
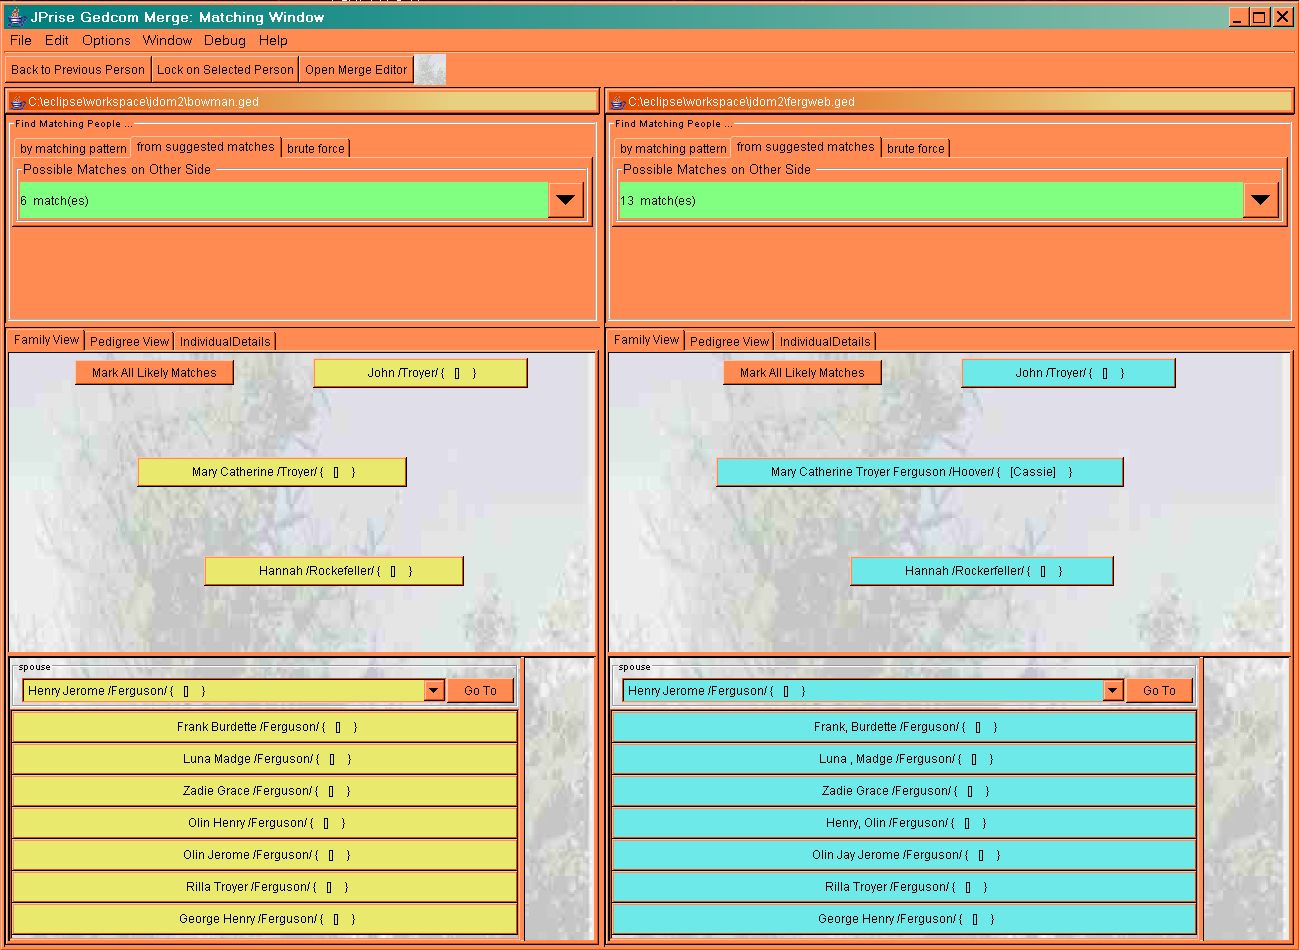
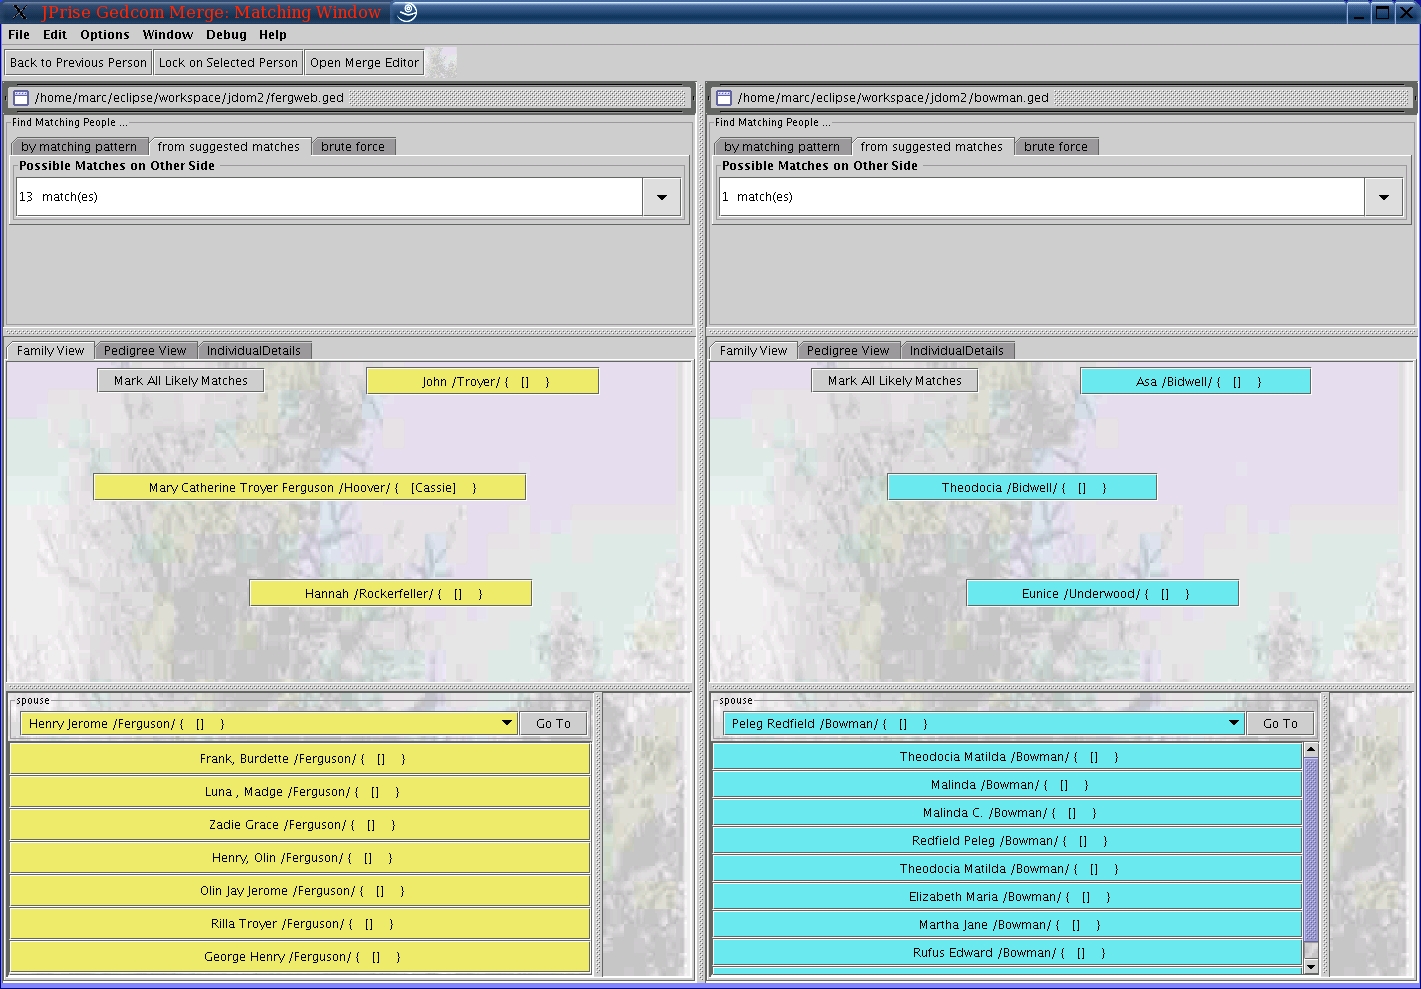
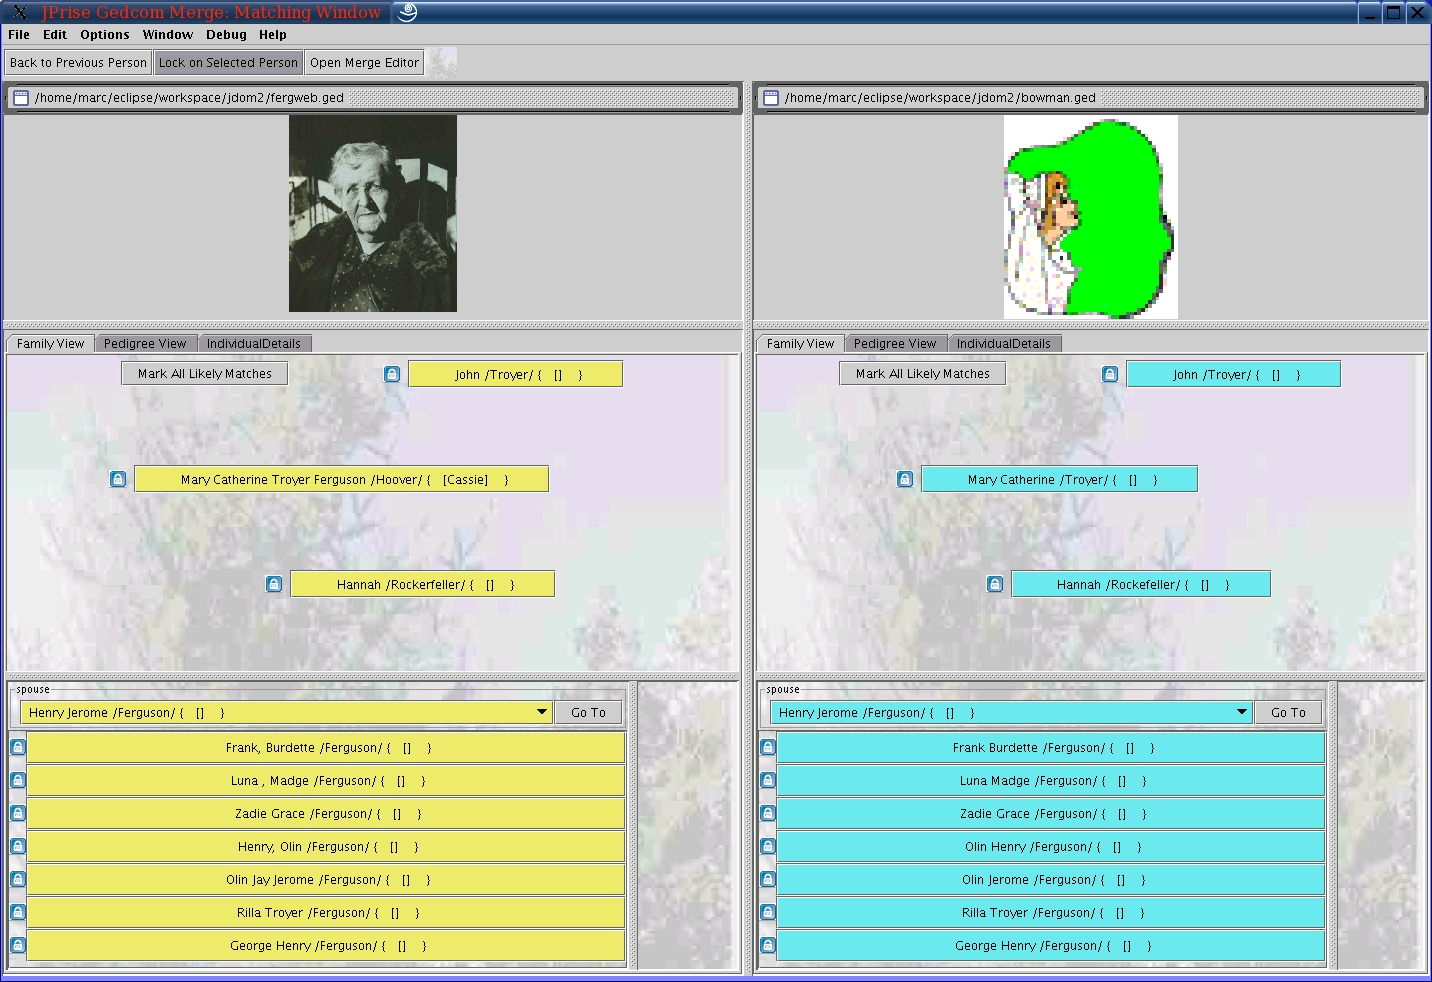
The starting point for using the JPriseMerge tool is with the various Match and Merge view windows. These windows are divided into two side by side views showing data from two different GEDCOM data bases. JPriseMerge is individual centric which means the primary selection is done based on a particular individual. Selection of an individual can be done by various intuitive means, for example by doing a pattern match against all or part of an individual's name, by stepping through the data base, or by simply using the cursor to point an click on an individual being shown in one of the match and merge view windows. The side by side views of the two GEDCOM databases can be locked together. This means that if the user navigates to an individual in one view pane, JPriseMerge will use a very smart set of heuristics to find and display the corresponding individual in the other database and display it also. This feature easily allows the user to compare differences between databases and decide when a merge operation is necessary to bring data from one of the databases into the resultant database that will be created. Gedcom merge NEVER touches the data in the original databases, instead it takes one of the input databases and initializes the output database with it. It is this output database which is shown in the left side panes of these view. The right side shows the other source database from which data will be merged into the left/resultant database. The following 3 rows show various views, with short explanations, of each type of Match and Merge display that are available to the user. Side by side comparisons of the difference between viewing in unlocked versus locked mode are shown. |
||||||
|
||||||
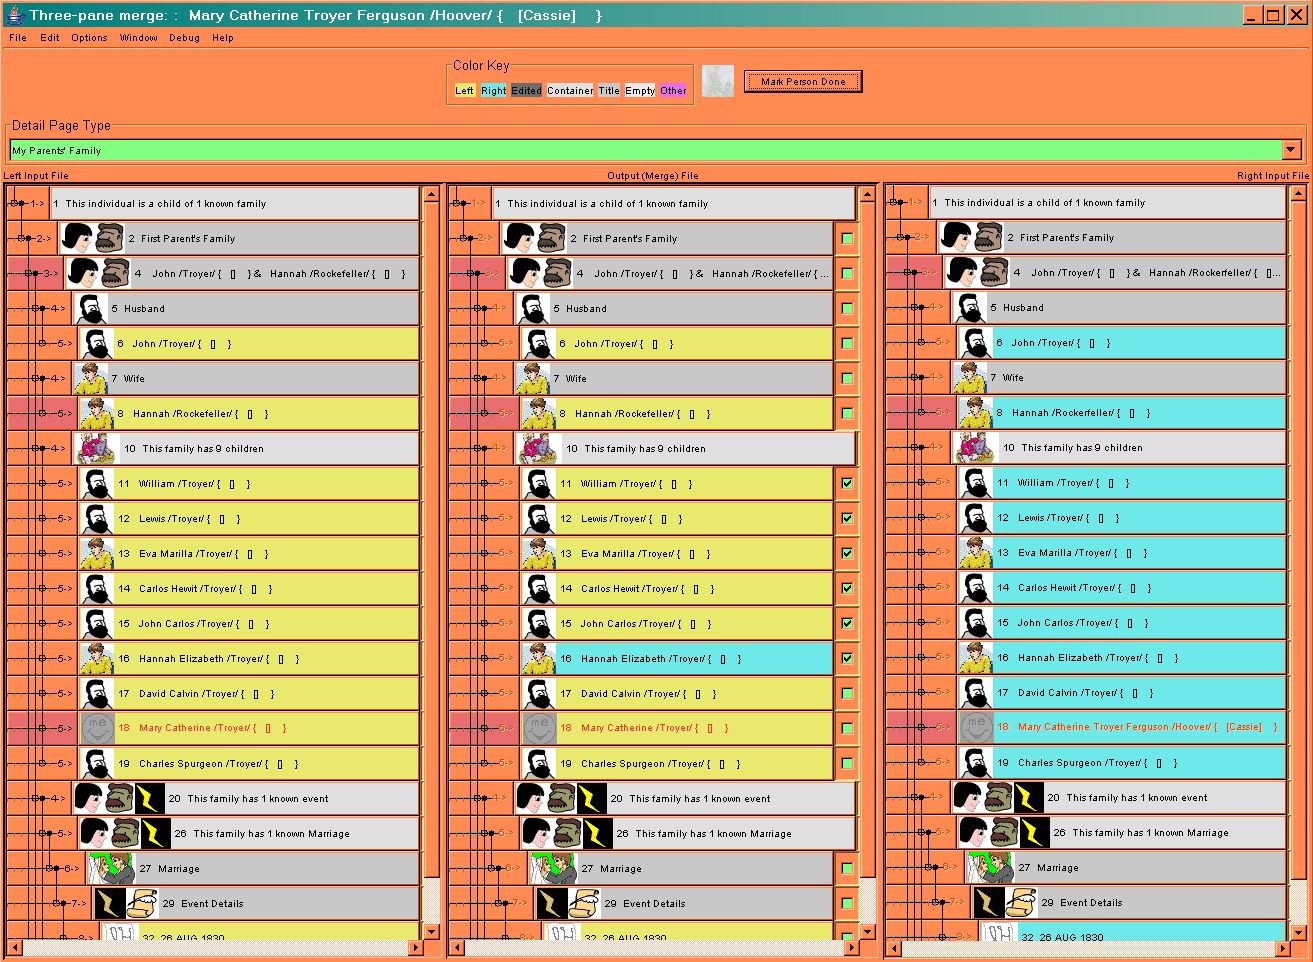
Three Pane Merge View
It is within the three pane merge view that the user will do the actual work of merging her's/his databases. Here the detailed information of all the GEDCOM elements associated with the selected individual are brought into a side by side view. The two source data bases are shown in the left and right panels and the resulting merged database is shown in the middle. Where database elements are missing, empty panels are inserted to keep the alignment between elements in agreement. Merging is done by simply clicking on the item desired and JPriseMerge does the magic of maintaining and inserting the data into the appropriate place of the resulting GEDCOM database. When individuals are selected to be merged from one database into the resultant database, JPriseMerge handles this in a special way. First is uses smart heuristics to help the user determine if the individual is already in the resultant data base and just a link is needed to be established. For example, when adding a new child or parent. When this happens, JPriseMerge will present the user with a Match Selection View (described next below) where a list of probable matching individuals are presented. The user can then select one of these individuals if it is the one he/she wishes to use for the merge, or the user can tell JPriseMerge that the individual is entirely a new one not already in the database. If that is the case, the basic information about the new individual will be brought into the resultant data base, and the individual will be places on the TODO list in the Progress Manager so the user can go back to it later and complete the merge process for that individual. (This is necessary because it is impossible to automatically merge in additional relationships for the new individual such as parents, spouses, children etc without risking mistakes.) This process guides the user along safely and completely, while retaining complete control over the merge process and allows him/her to decide exactly what gets merged in to the new database. Additionally the user can perform edits on these elements to fine tune the data and correct it.
|
||||||
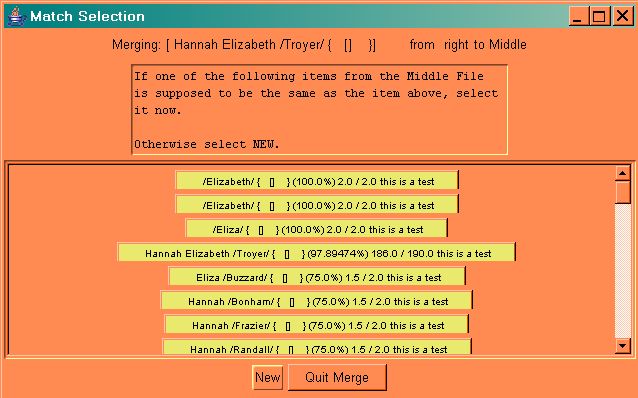
Match Selection View
The match selection view is brought up whenever the user tries to merge in an individual or a GEDCOM record element, such as a family or note, which may have multiple references to it from other GEDCOM elements within the resultant data base. When this is require, JPriseMerge will examine the element which the user is requesting to be merged in, and looks for similar elements which may already be in the target database, compute a probable degree of match, and display the most likely candidates for the user to select from. Here the user can tell JPriseMerge to either reuse an existing GEDCOM element by selecting it from the list, or she/he can tell JPriseMerge to create a new element and copy data from the source database into the target data base for that element. |
||||||