Three Pane Merge Window
Table of Contents
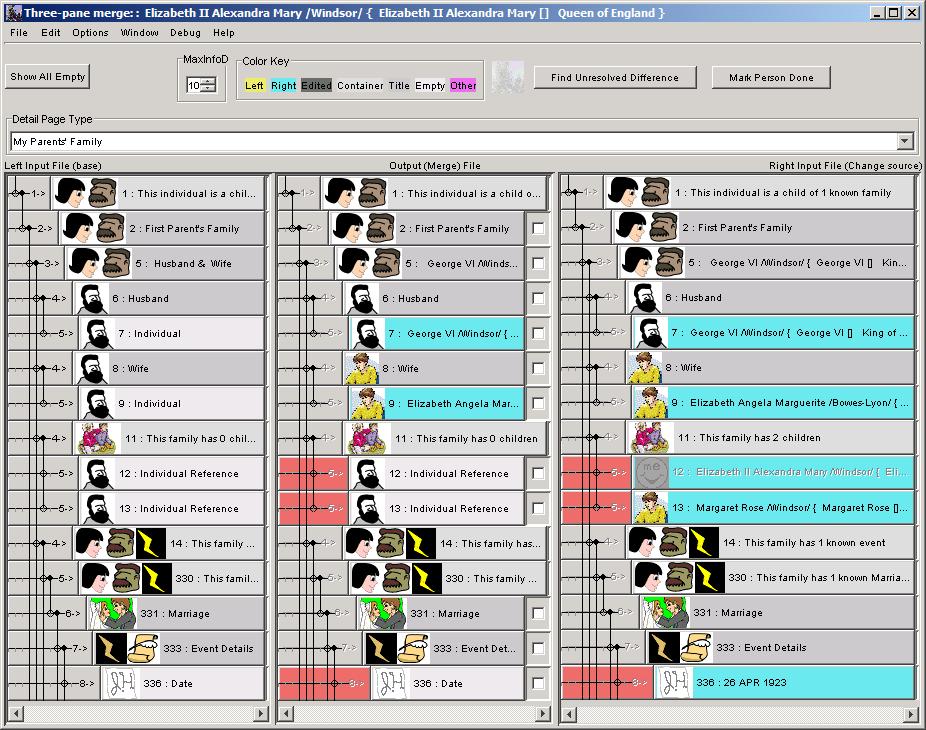
This is the view of the Three-Pane
Merge Window where much of the key work gets done. There
are three panels showing data from from the users GEDCOM databases. The
left most panel shows data from the base file, the
right panel shows data from the merge source file,
and the middle panel shows the data in the merge output file.
These panels are laid out in a side by side fashion so that the user
can rapidly find differences and make decisions about what data needs
to be merged, from which data base, into the new merge output file.
This is the essence of the job the user does in this window, to pick
and choose data from the two source files and to put/merge this into
the new merge output file. None of the data in either
the base file, or the merge source file
will or can be changed in any of these operations.
The layout
Just like the individual
detail views in the Matching
Window, each column is in tree or outline form using indentation to
show what
contains what. It is assumed the reader is already familiar
with this organization and we will not reiterate the details here. If
not, please read the documentation on the individual detail views
in the Matching Window. However,
there are some additional details.
Whenever the Three-Pane Merge Window is opened to one of its views,
JPriseMerge automatically scans for differences between the base
file and the merge output file, or the merge
source file and the merge output file. If it
finds that there is a difference in the data being showed in a data
panel, then it marks it. The tree indicator button is colored
red if
there are differences that might need resolution.
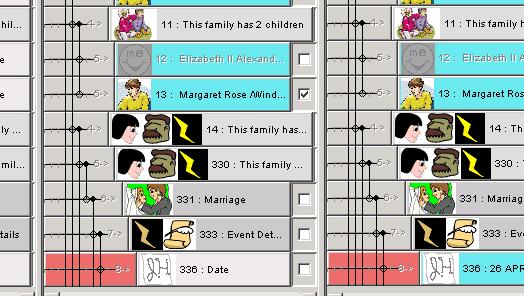
Each of the data panels in the middle panel also contain a checkbox.
As you merge data into the middle panel, this check box is available
for you to indicate that you have resolved the differences to your
satisfaction. Simply click on the box to check it, and JPriseMerge will
remember the status of that check from one session to the next whenever
you restart JPriseMerge and/or revisit this particular panel. In this
way you can keep track of and remember whether you have examined or
merged in that data. If the tree indicator button was marked red,
showing there was a difference, then JPriseMerge will remove the red
color also, when you check these boxes.
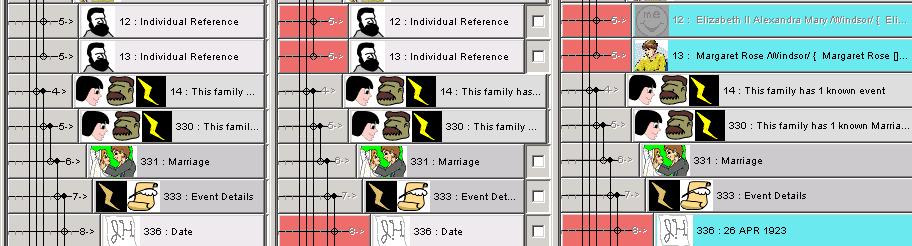
The data in these three columns is vertically aligned for easy
comparison and editing. Where necessary, empty data
panels are inserted to
keep this alignment. (shown above) An empty data panel is
like an empty folder and is just a place holder. You probably will want
to fill these in by merging in data from the panel which actually holds
real data, if the empty data panel is in the middle panel for the merge
output file.
To further facilitate the users understanding these three
columns/panels always scroll together.
To Summarize:
- On the right is the merge source file which has
potential new information for you to move to the merge output file. (See Doing
The Merge, below).
- In the middle is the merge output file which will become
your new file when you write it out at the end of the project.
- On the left is a frozen
copy of the merge base file
that does not get edited as you make changes.
- Above the three columns are pull-down selections for the pages
and
sub-pages of information available on a person. These pages may
be empty, and if so, that will be indicated in the page title in the
selection pull-down.
Colors are used to indicate either the type or the source of the data
-- see Colors Options Help
Doing the Merge
Each item in the left and right lists is an active button.
Pressing a button will move the data that button represents to the
center column and into the merge output file.
If you click on a container data panel or a title data panel then ALL
the data nested inside/below the selected data button below, it will
also be moved. Moving all the data from the merge source file to the merge output file for this page can
be done by selecting the top data panel button on the
right column. If you accidentally overwrite some data that you wanted
to keep, you can click on the corresponding data panel from the other
source data column
Finding Needed Work

Pressing the "Find Unresolved Difference" button will step
automatically through all the pages of available information
until a red indication of an unresolved differences shows in the
window. If no pages have such an indication, a message will be
displayed, to tell you that fact, and suggest that you mark the person
as done.
Merging People
It is important to understand that any data panel which shows an
individual, such as a child of a family, then that data panel
represents a GEDCOM reference
element. When you ask JPriseMerge to merge in an individual from
one of your source databases, into the merge output file,
JPriseMerge first gathers up all the information about that individual
from your source database. Unless you have previously marked this
individual as a match with an individual in your merge output
file, see Recording
Matches), then JPriseMerge automatically searches for any possible
matching individuals in the merge output file. Here
again, JPriseMerge uses its powerful matching logic to compute
probabilities of likely matches.
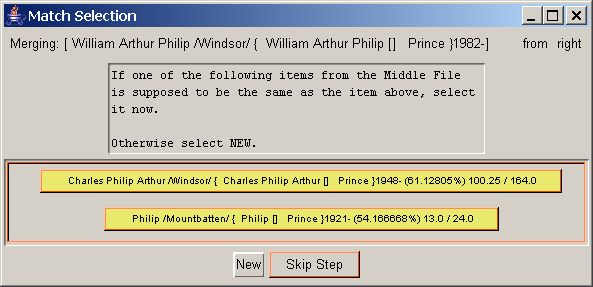
When JPriseMerge is finished looking for possible matches, to the
selected individual that is being merged in, it presents you with a
Match Selection dialog box much like that shown above. At the top it
shows the indentity of the selected individual and which column it came
from. In the middle it presents a list of buttons for the possible
matches that were found. To help identify individuals, both the
individuals name and birth year are shown, along with the computed
probability and matching elements ratios.
Selecting one of these buttons tells JPriseMerge to use that
individuals GEDCOM record element (in the merge
output file) as the target of the reference element
being replaced by this merge operation. Essentially, doing this tells
JPriseMerge that there is a match between the individual being merged
in from your source data file, with one already in the merge
output file, and JPriseMerge will mark the individuals as
matched and add him/her to the list of matched individuals
in the People Progress Manager Window.
If however, none of the individuals shown, correspond to the
individual you are merging in, then select the New button at the bottom
of the Match Selection dialog box. JPriseMerge will then create a new
individual record element in the merge output file database. As much of
the static information, (personal name(s), birth dates and simple
events and attributes etc. ), as possible, is then copied from the
source data base into the new individual's record element.
However, and this is important to understand, none of the child
elements of the individual which are reference elements, (for example,
families, note references, parents, spouses, children, etc. ) will be
copied/merged in automatically from the source data base into the merge
output file. The new individual will be added to the
list of matched
individuals in the People Progress Manager Window but not marked as
completed. This means you will still have to go to that new individual,
at some point, and resolve his/her reference elements
as needed.
JPriseMerge will do as much back linking as
possible also, automatically. To understand this concept, lets use an
example. Lets say we are working with an individual - John. John has a
spouse named Mary. Suppose we are adding/merging in a new child - Susie
to the family record formed for John and Mary. Not only will
JPriseMerge install Susie as a child of both John and Mary, but it will
automatically set up the new individual record element
for Susie so that the references to her parents, John and Mary are
filled in. Likewise if we were adding in a new parent individual then
JPriseMerge will handle the back linking so that the
new parent also knows who their child is. This is the only form of
automatic reference resolving that JPriseMerge can do, and it will save
you a lot of time an confusion.
If you accidentally clicked on an individual and decided you didn't
really mean to, when the Match Selection window opens, simply click on
the Skip Step button at the bottom, and that will abort the merge
operation and restore everything back.
Other
Shared/Linked/Reference Data
There are many kinds of data that are stored in GEDCOM files such
that it can be re-used in many places without copying it
over. Individuals, Families, Sources, Notes, Events, and
other GEDCOM element types are stored this way. (see description
of record elements and reference elements
in the Matching
Window help document) If such an item is being merged from the merge source file to the merge output file you will be asked
if it is new or the same as an old one, as is done for Individuals in
Merging People above.
If you decide to merge whole elements at once, by clicking on a
title data panel, or whole containers by clicking on
a container data panel, JPriseMerge will
automatically step through all the child element's data panels,
one by one, and perform a merge operation on each as if you had clicked
on them individually. This means that each time it encounters a data
panel for a reference element, then
JPriseMerge will search for possible matching records in the merge
output file and bring up the Match Selection window for each.,
So be prepared for quite a bit of interactive when you do this.
Manual Alignment
To make the merge operations easy, JPriseMerge attempts to keep the
data panels in alignment with each other, in the different columns for
each data base. Sometimes this requires JPriseMerge is add empty data
panels in one of the columns. In this way, when you click on a data
panel in say the column for the merge source file, you can visually see
what panel in the middle merge output file column will be replaced with
the new data. Sometimes, however, JPriseMerge may not be able to get
this alignment quite right (we are working to improve this!) so it may
require a bit of help from you the user.
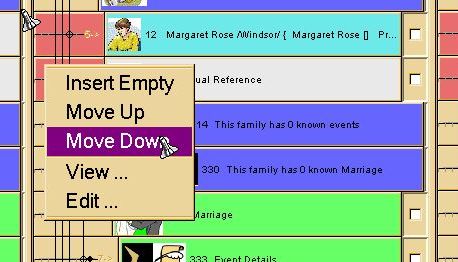
By placing the cursor over a data panel, the
right-click-pop-up menu provides the ability to do the following
operations in all columns to achieve the correct alignment. This
new alignment information will be saved in the project file so that it
will not need to be repeated, even if you have to revisit this page
over separate sessions. (This does not affect, in any way, the
actual data of your base file or merge
source file.)
- Insert Empty - Insert a new empty panel, for the
same type as the data panel the cursor was over, above that data panel.
- Move Up - Move the data panel, (if possible) up
one, i.e. swaps places with the data panel just above it.
- Move Down - Move the data pane, (if possible)
down one, i.e. swaps places with the data panel just below it.
- Delete Empty - (To be implemented)
Removes an empty panel and causes all lower panels to move up one.
- Delete - (To be implemented) Available
in the center column for the merge output file only.
Replaces a panel with an empty panel.
To understand why user intervention is sometimes necessary to help
out with alignment of data panels, lets look at a couple of scenarios.
Lets say we are wanting to merge in children of a family, for example.
The base file shows the family has one child, David,
and the merge source file also shows this family has
one child Sara. Both of these source data bases are incomplete because
in actual fact the family has two children. JPriseMerge has no way of
KNOWING this ahead of time, so when it displays the Three Pane Merge
window for this family, it will only show the family as having one
child. And that since they are different it will indicate that this
needs to be resolved. Therefore the two child data panels
will initially be in alignment with each other. Clicking on Sara to
merge her into the middle merge output file would result in an
unsatisfactory solution since that would not add Sara, but replace
David with Sara. So, to get around this, we need to add an empty data
panel above David, in the middle column for the merge
output file. When the empty panel is added, above David's
panel, JPriseMerge will also automatically add empty panels into the
columns for the base file, and merge source
file, so as to keep the alignments correct. However, it still
may not get it exactly right, and we may have to use the Move Up or
Move Down buttons so as to align all the "David panels" up with each
other, and the "Sara panel" up with the new empty data panel.
Once we have accomplished that, then Sara can be merge in, to replace
the empty data panel in the middle column, just like
any other merge operation.
Another scenario might be, a collection of notes are defined for
some event. Both the base file and the merge
source file may have the same number of notes defined for that
event, but JPriseMerge may have been unable to figure out which note
corresponds to which note when it listed them. So again, you the user
may have to move them around, manually aligning them up with each
other, before attempting to carry out your merges.
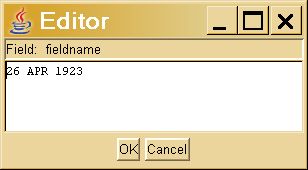
Touching Up / Manual
Editing
Sometimes you may decide that you got the right information but it
isn't spelled right or capitalized right or some similar
problem. The right-click-pop-up menu for the merge
output file data panels (shown above)
allows you to call up a text editor to make small
corrections.
- View... - Shows the full contents of a data
panel. (Often JPriseMerge has to truncate the display of data in the
data panels in order to fit it in the column.)
- Edit... - Calls up the Edit dialog box and
allows the user to modify the data in the data panel. This
will not work for view panels in the left or right column, nor will it
work on Title and Container data panels.
Click here
to provide feedback to JPrise Inc.
Copyright © 2004 JPrise
Inc. All rights reserved